Create 16:9 short clips
Video walkthrough: configure Agentic 16:9 highlights, review a finished take, and open Studio. Use fullscreen to read the controls. The recording uses different demo footage from the written example below.
This example uses Nina (2025), a live-action English short drama. Agentic Long → Short discovers a moment and recuts it into an editable 16:9 take. Here, the story is a quiet goodbye between two people.
1. Configure the run
From the Ready Nina source in Sources, choose Create highlights.
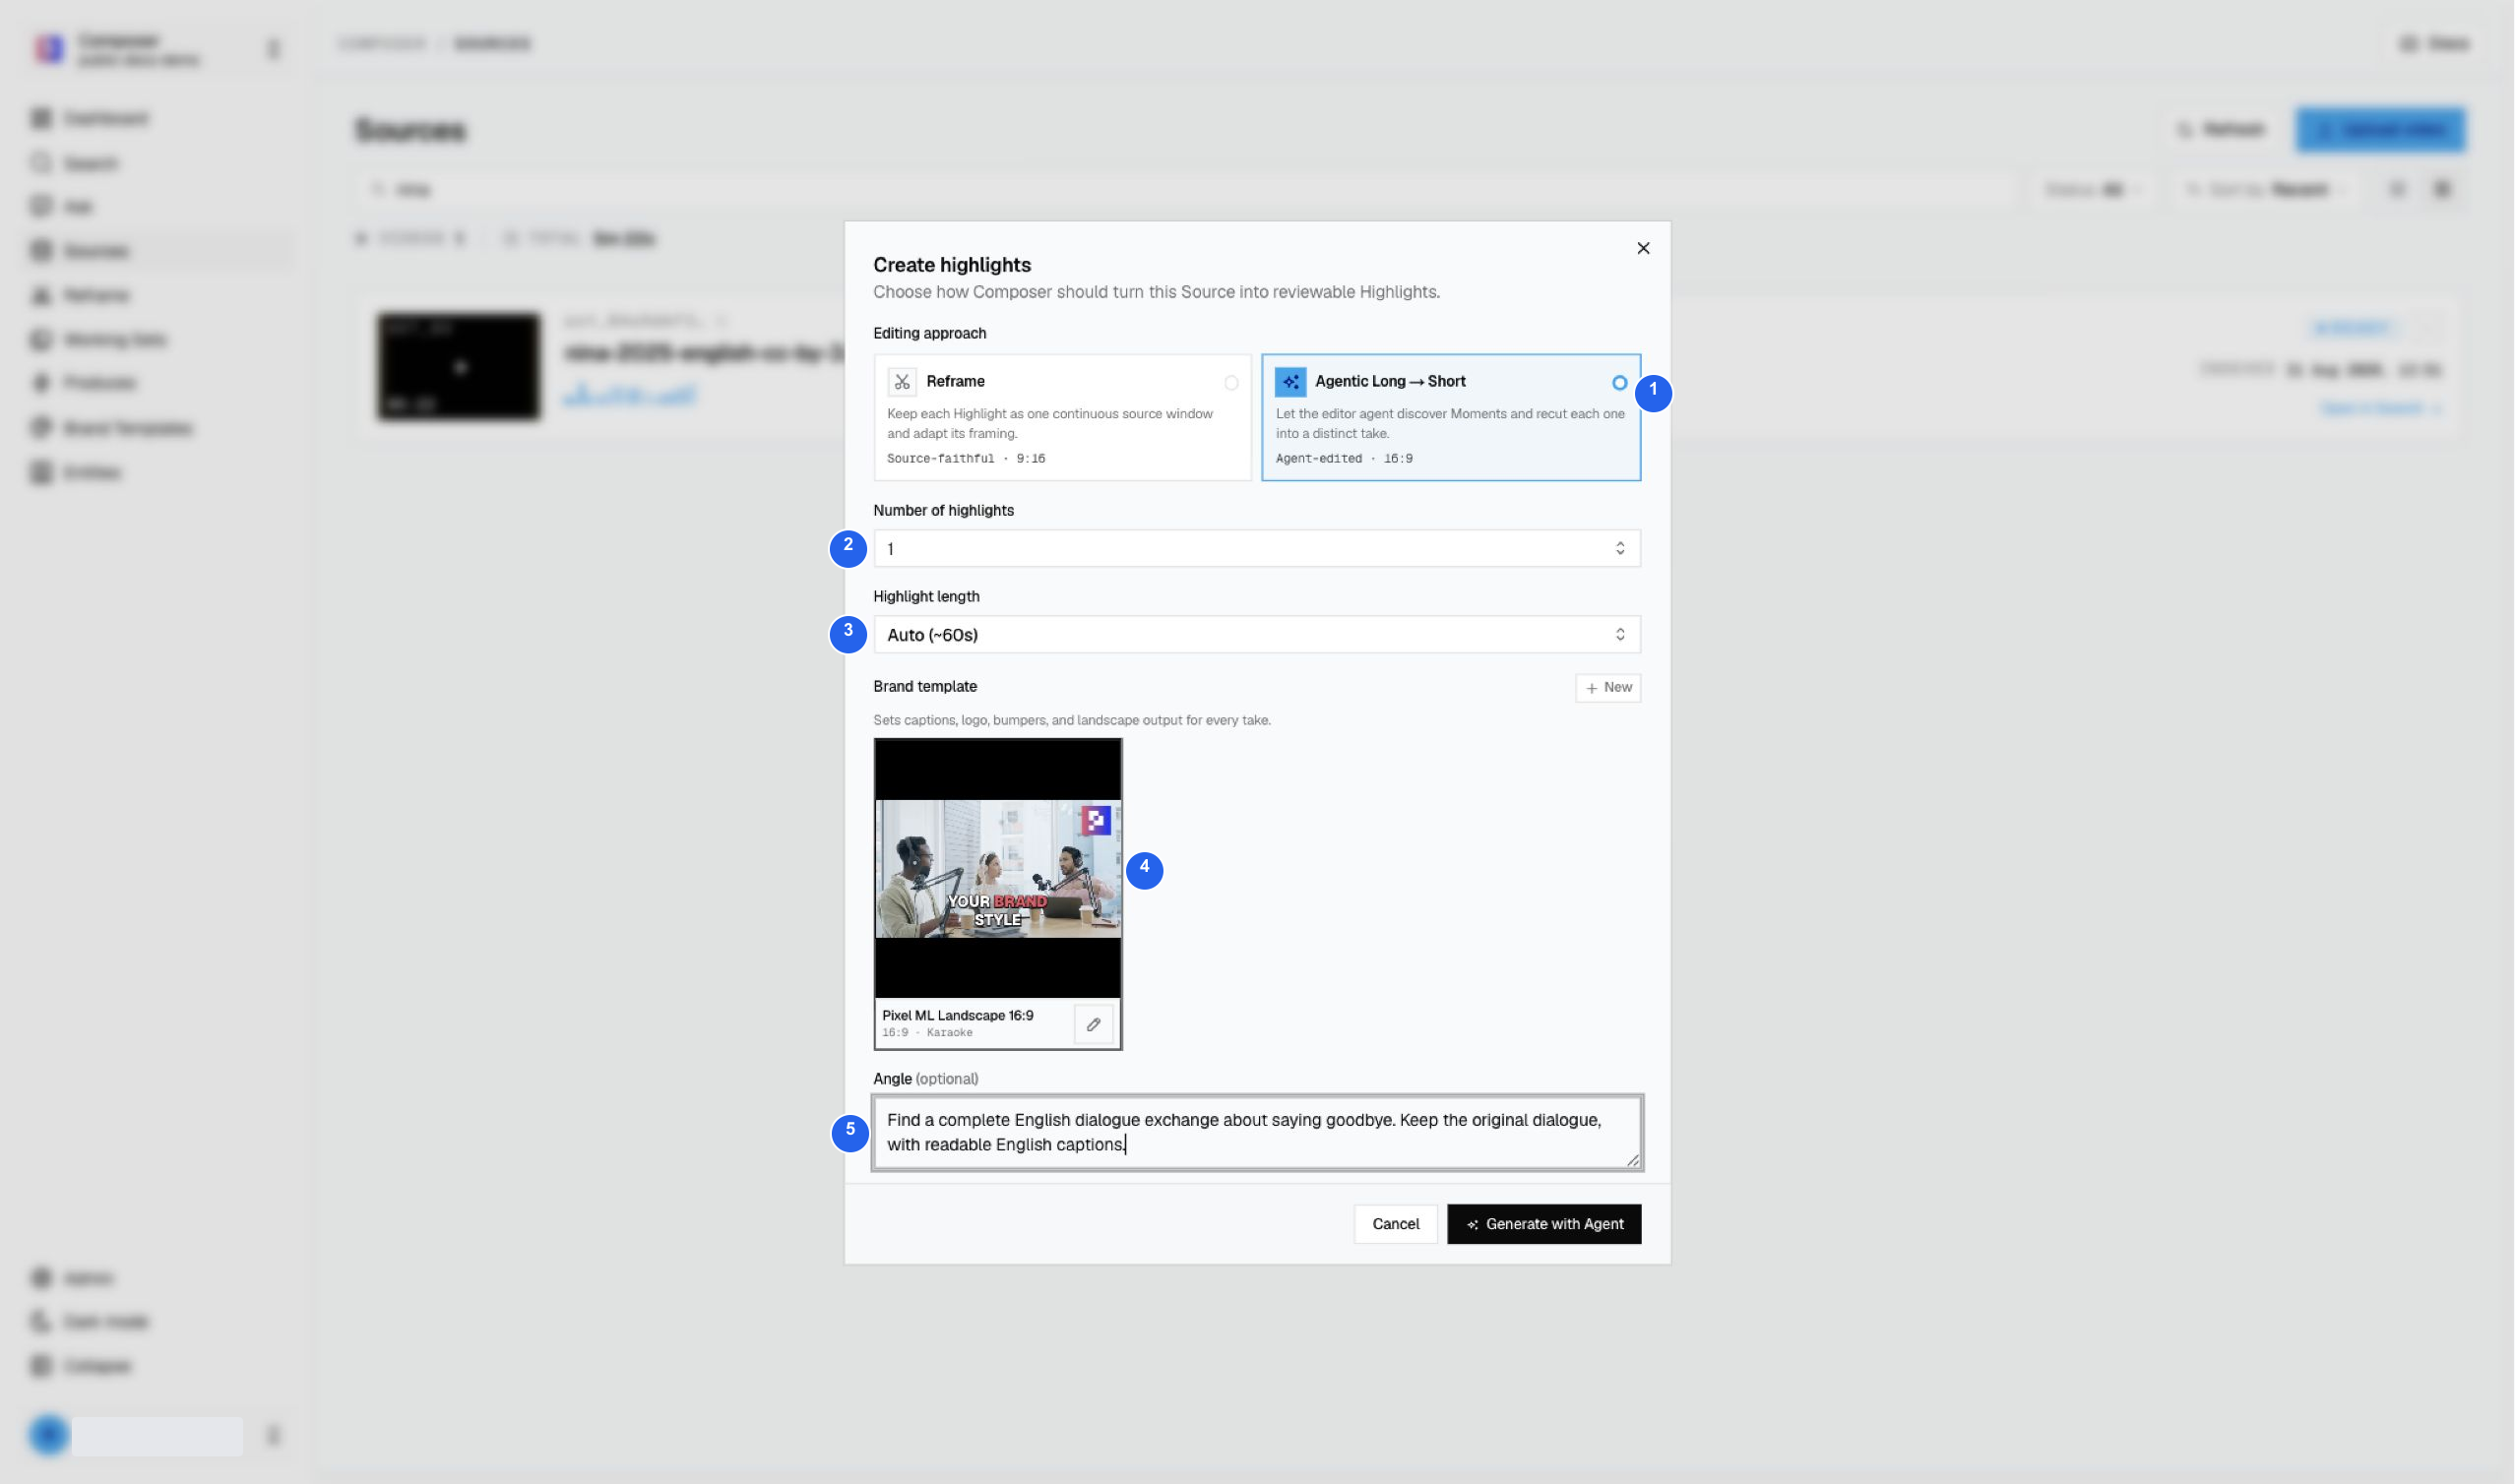
| # | Setting | Value used |
|---|---|---|
| 1 | Editing approach | Agentic Long → Short · 16:9. |
| 2 | Number of highlights | 1. |
| 3 | Highlight length | Auto (~60s). |
| 4 | Brand template | Pixel ML Landscape 16:9, with Karaoke captions. |
| 5 | Angle | A complete English dialogue exchange about saying goodbye. |
Use a concise angle that describes the moment you want:
Find a complete English dialogue exchange about saying goodbye.Keep the original dialogue, with readable English captions.Select Generate with Agent once. Let the existing run finish before starting another.
2. Open the generated take
Return through Reframe → Agentic if you leave the run page. When the take is available, choose its Open in Studio action.
The result is I’m Gonna Miss You, saved as im-gonna-miss-you. Studio displays 1:05 including the brand bumpers. Auto (~60s) is a target, not an exact runtime.
3. Review captions on an actual dialogue frame
Open the take in Studio and let its preview media load. Click miss in the caption transcript to seek to the opening dialogue, around 0:03, after the intro.
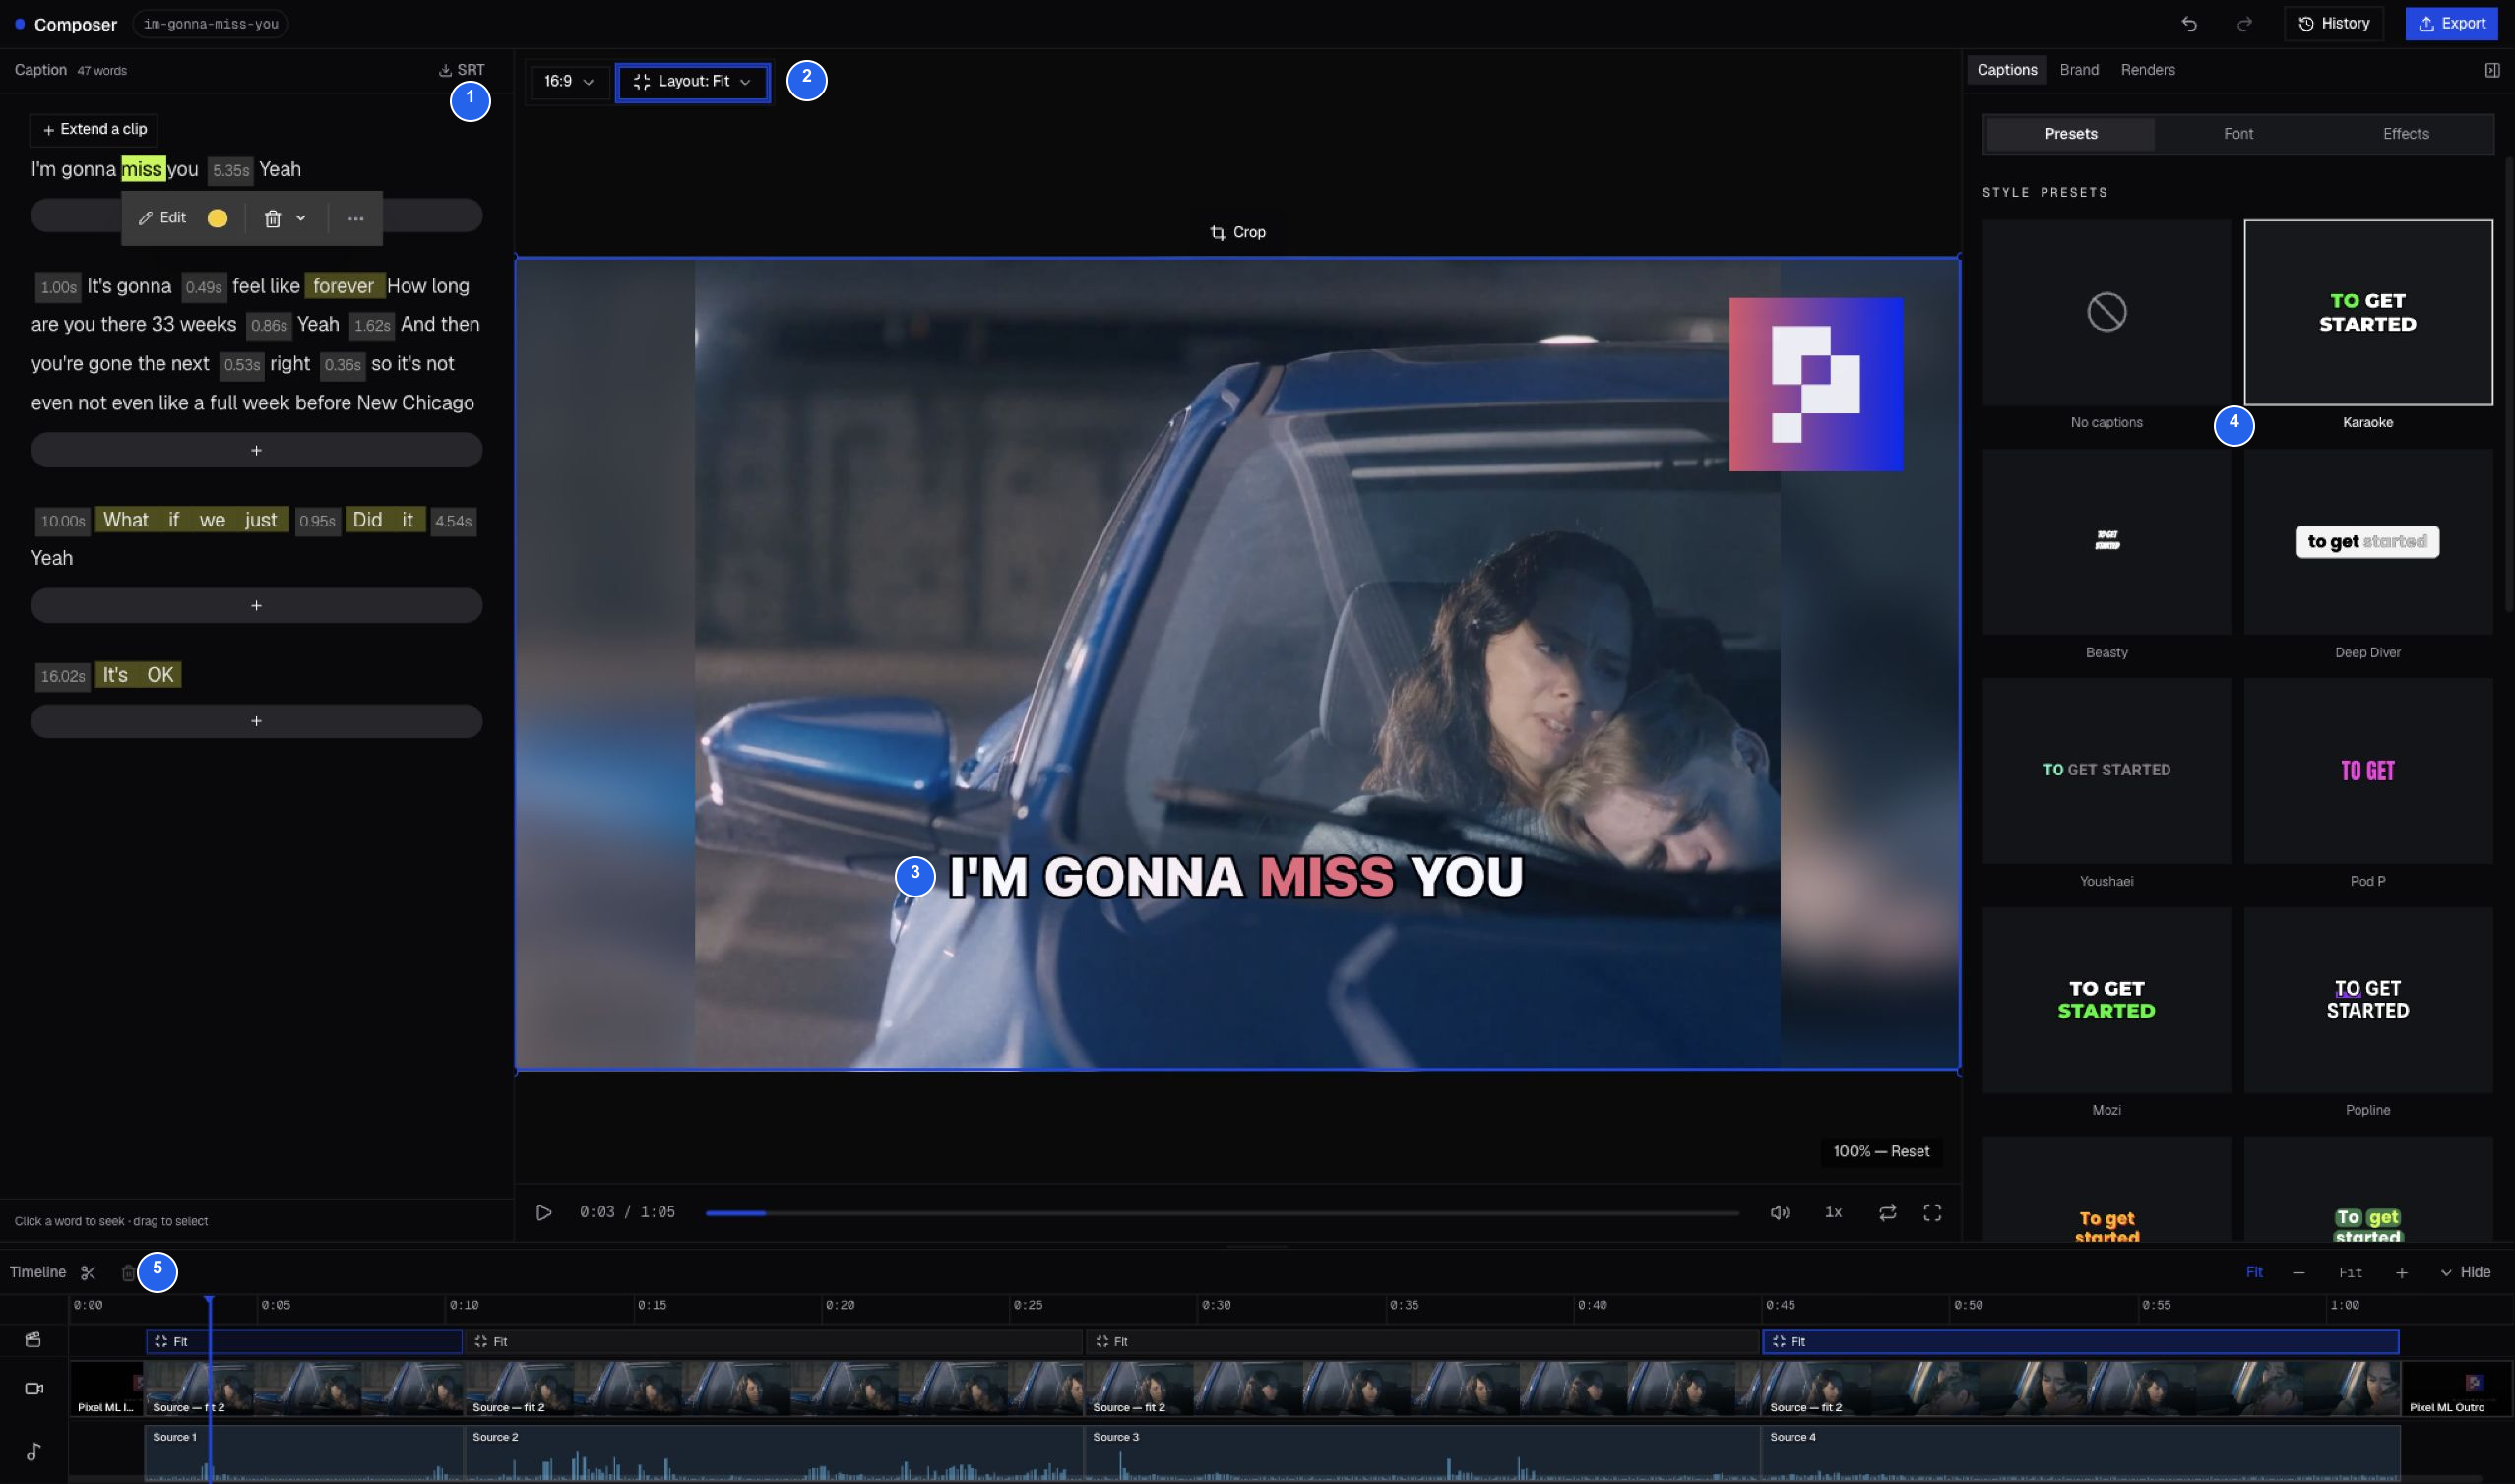
| # | What to inspect |
|---|---|
| 1 | The 47-word editable English transcript. Click a word to seek; select it to edit. |
| 2 | 16:9 output with Fit for the selected source scene. |
| 3 | The caption “I’M GONNA MISS YOU” on the video, with the active word highlighted. |
| 4 | Karaoke selected in the caption presets. |
| 5 | Four source sections between Pixel ML Intro and Pixel ML Outro. |
This screenshot shows a real caption over the playing source scene, not a caption preset thumbnail or an intro frame.
The original film is 4:3. For this review, each of the four body scenes was changed from Fill to Fit in Studio, keeping the full picture within the landscape canvas. Select a scene in the timeline, then use Layout → Fit; repeat for the other source scenes.
Listen before approving the transcript. For example, the generated text contains “33 weeks”; check the spoken number against the audio and correct it if needed. Also review the long pauses and scene boundaries. A successful generation is a first cut, not a completed editorial review.
4. Check the neutral branding
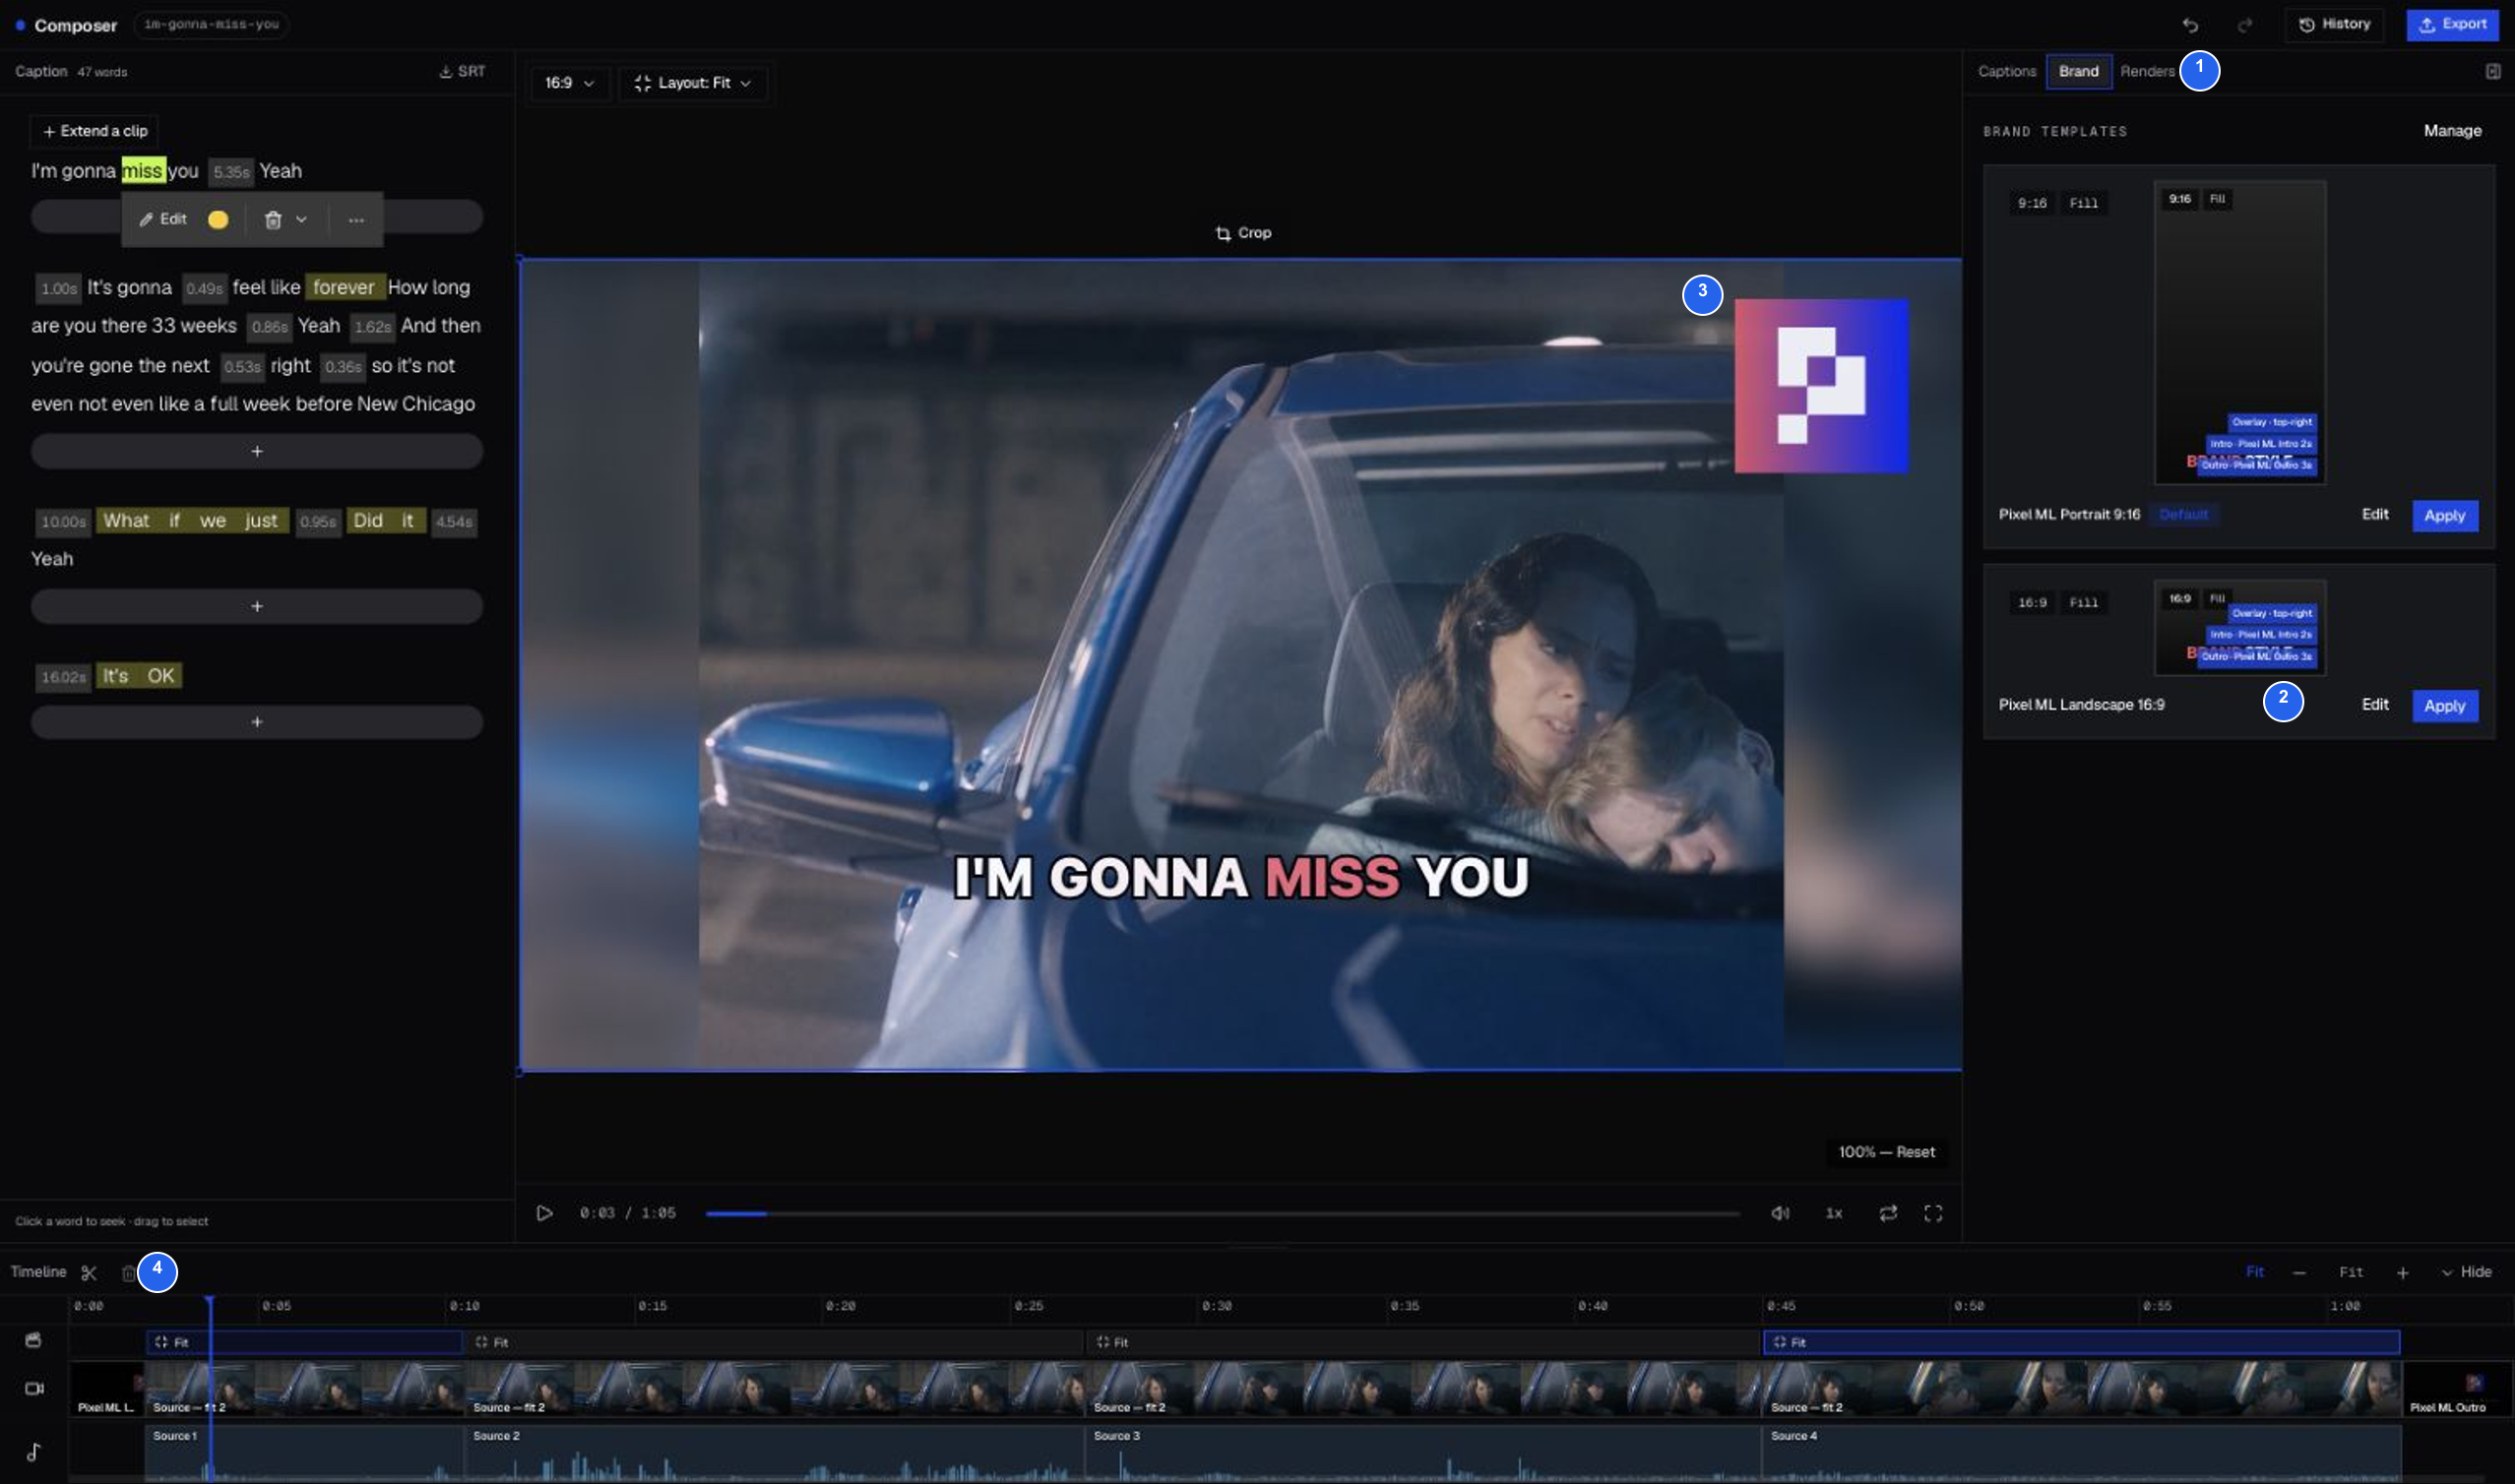
1 Brand tab, 2 Pixel ML Landscape 16:9 template, 3 Pixel ML logo in the preview, 4 intro and outro on the timeline.
Play both bumpers and confirm the logo, captions, and output shape suit your project. The example uses Pixel ML assets only. Applying a different template can change these settings, so check the preview again afterward.
5. Render the reviewed version
After changing layouts, captions, or branding, select Export to render the updated composition. Wait for Ready, then download and play the full MP4. Do not assume the earlier generated preview includes later Studio edits.
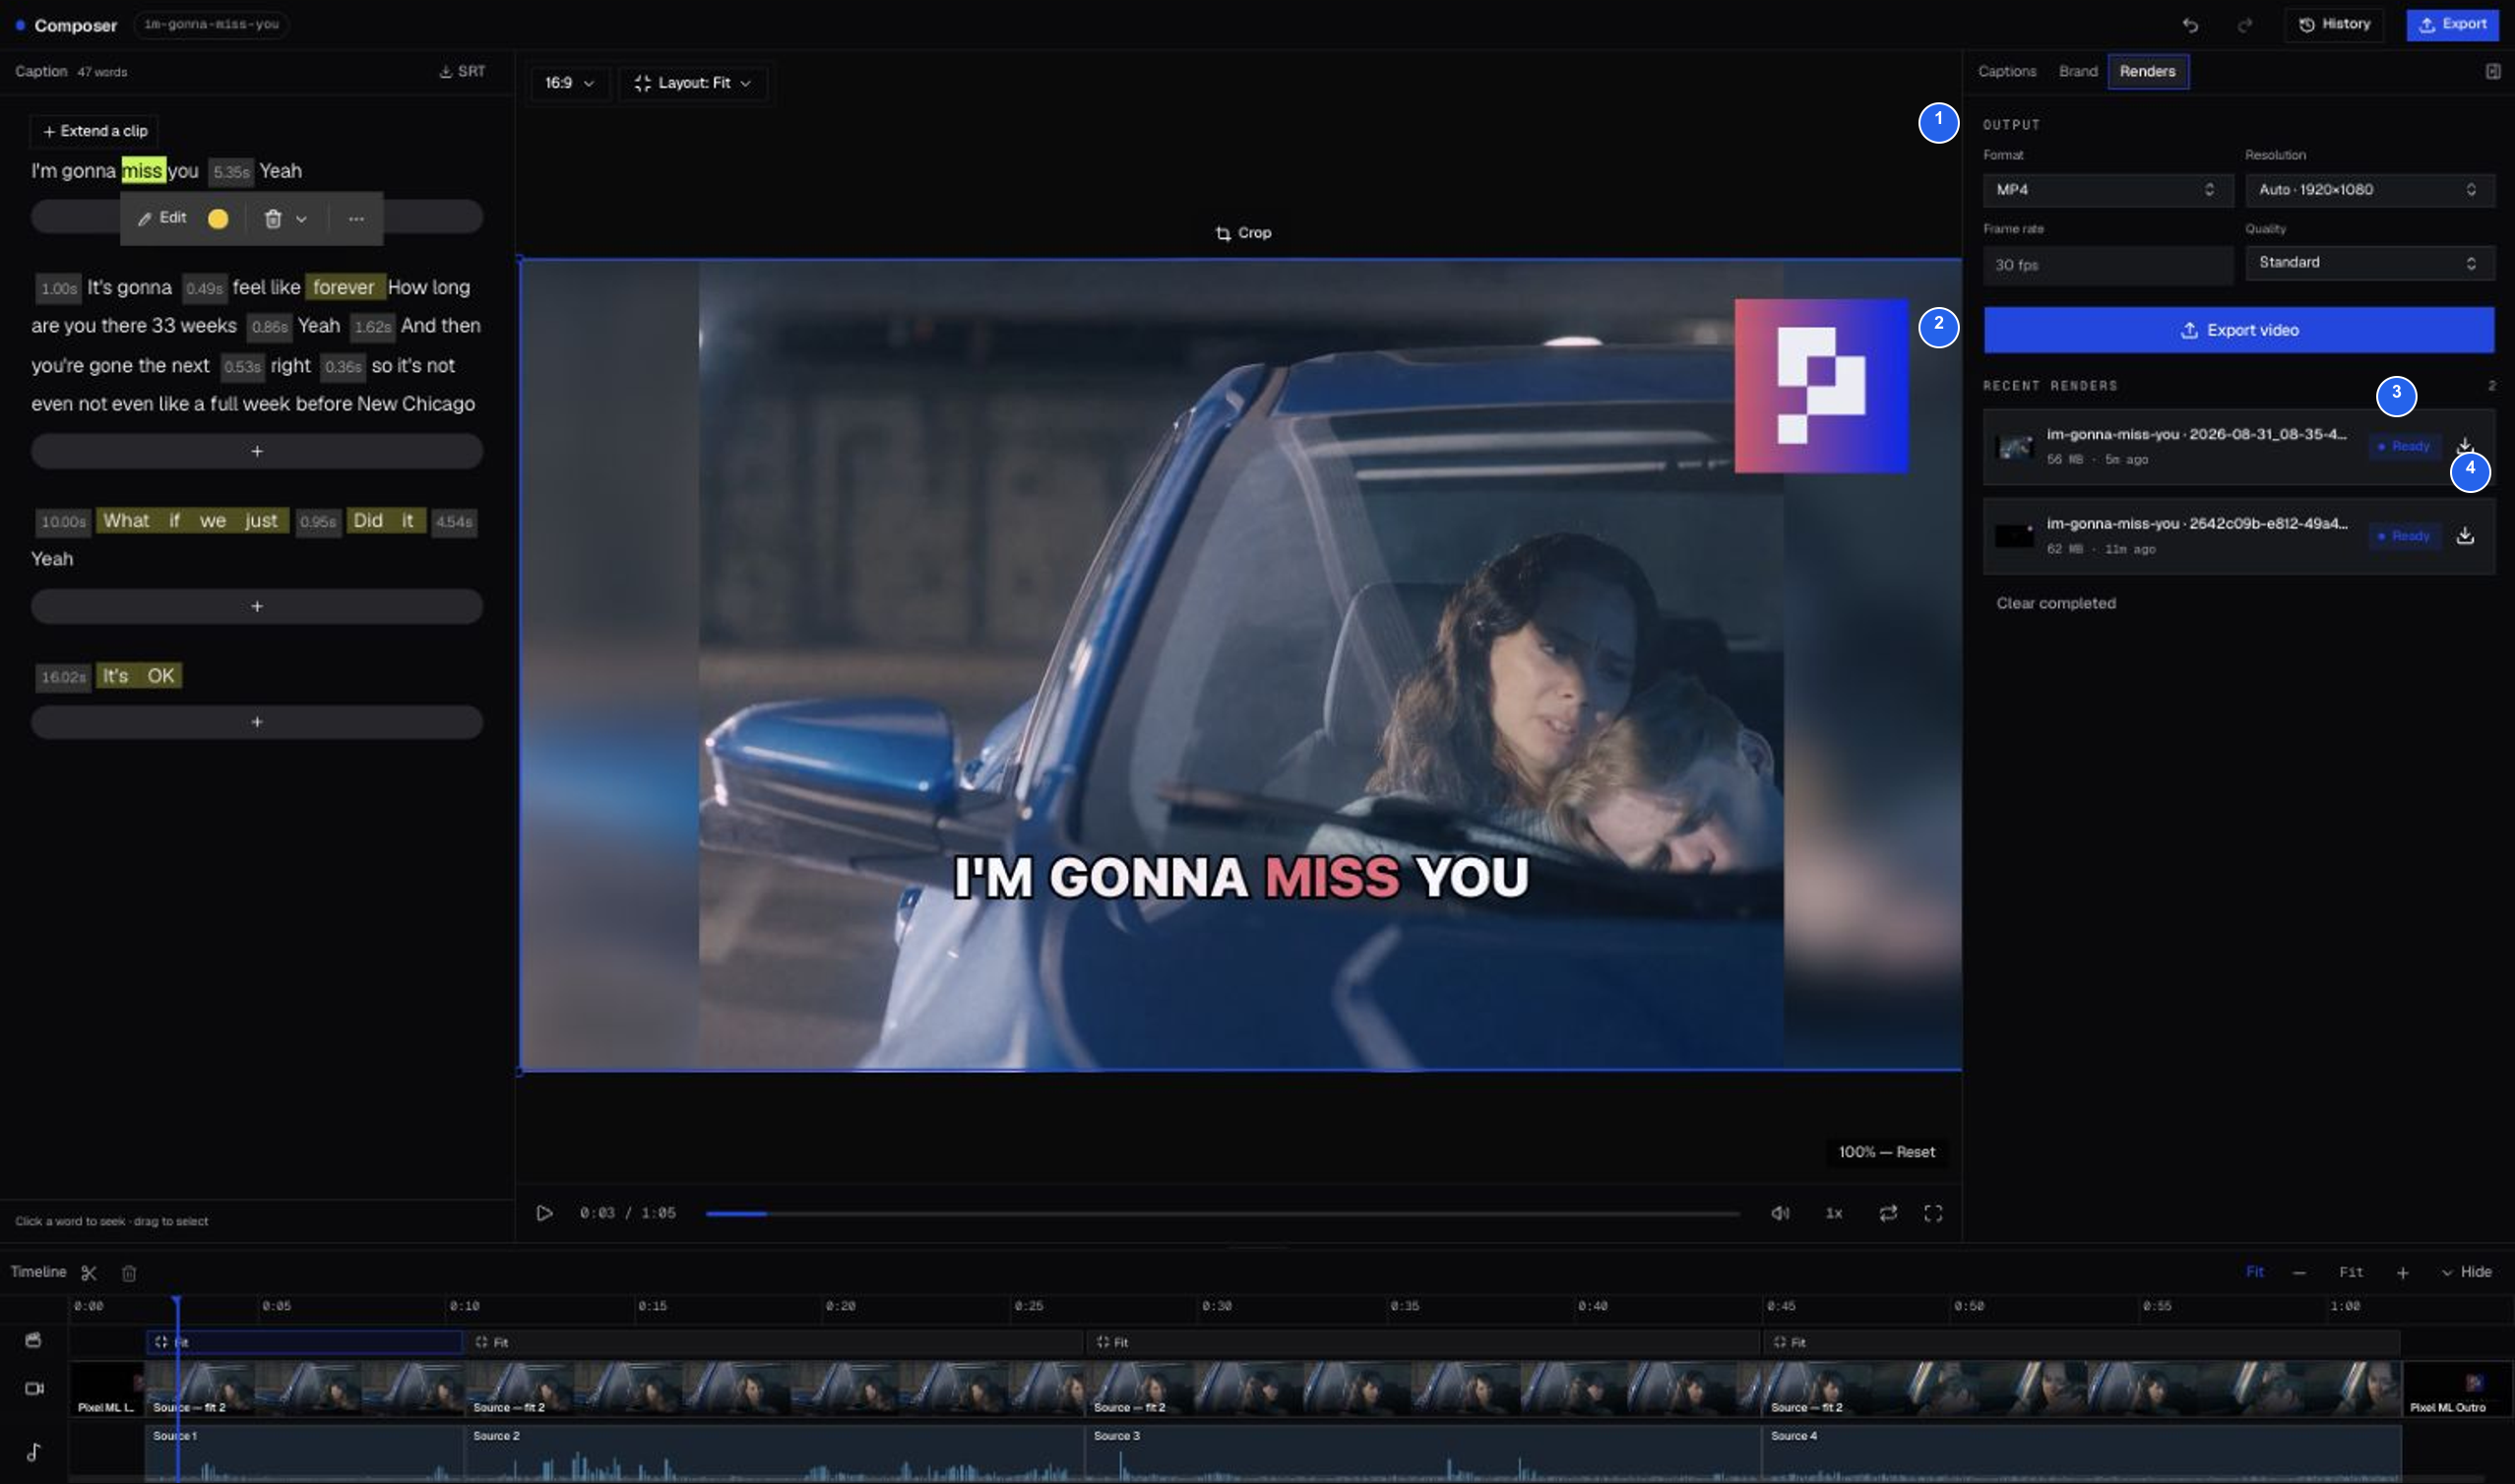
1 MP4 output settings, 2 Export video, 3 the newest render’s Ready status, 4 its Download action. The newer entry is the render created after changing the four source scenes to Fit.
See Studio’s numbered control guide for detailed caption, layout, and export controls.
Footage: Nina (2025), Brendan Kaplan — CC BY 3.0. Film credits, content note, and attribution requirements.