Video CMS User Guide
User guide for the Video CMS system with AI-powered object and action detection.
1. Login
Access the Video CMS system through your web browser.
Step 1: On the login screen, enter your Email and Password.
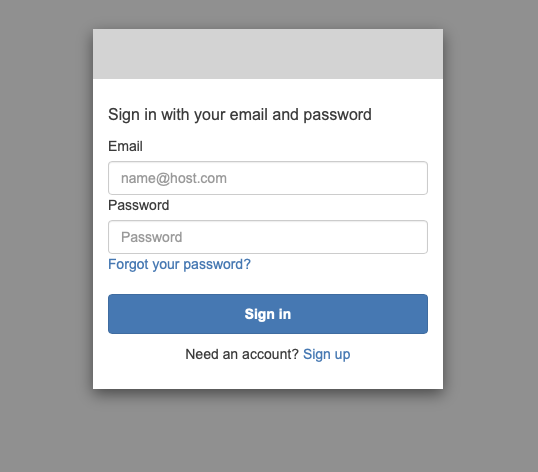
Step 2: Click the Sign in button to log into the system.
2. Index (Video Indexing)
Purpose
The Index feature allows you to create and manage indexes for your video camera sources. Each index represents a video data source (e.g., a camera at a specific location). Once videos are indexed, the AI system automatically analyzes and identifies objects, actions, sounds, and logos appearing in the video — enabling fast search, analysis, and research.
How to Use
Step 1 – View Index List: From the left navigation bar, click “Indexes”. The screen displays a list of all created indexes, including:
- Index title: Index title and identifier (e.g., danang / idx_dan)
- Last updated: The most recent update date
- Action: Menu (⋮) to edit or delete
Step 2 – Create a New Index: Click the ”+ Create index” button to create a new index.
- Set the index name
- Configure the video source
Step 3 – Manage Configurations: Switch to the “Index Configs” tab to view and manage indexing configurations.
Step 4 – View Indexed Videos: Click on an index name to open its details.
- The “Videos” tab displays a grid of indexed camera video clips with timestamps (e.g., 2026-02-11 03:01:51)
- Each video has a unique identifier (e.g., vid_cam_dan_77)
3. Search (Video Search)
Purpose
The Search feature uses AI to find video segments containing specific objects, actions, sounds, or logos across all indexed video data. Simply describe what you want to find in natural language (e.g., “dog”, “fallen person”, “queue”), and the system will return matching video clips.
How to Use
Step 1 – Open Search: From the index detail page, switch to the “Search” tab.
Step 2 – Enter a Search Query: In the search box, type a description of what you want to find. For example:
- dog — Find video segments where a dog appears
- fallen person — Find segments where a person has fallen
- queue — Find segments with a long queue of people
Step 3 – View Results: Click the search icon or press Enter. Results appear in a grid layout, each showing:
- Rank number of the result (1, 2, 3, …)
- Video name (e.g., vid_cam_dan_69)
- Time range in the video (e.g., 0.17 – 0.17, 3 – 3)
- Thumbnail image of the video segment
- “See full video” button to watch the full original video
Step 4 – View Video Details: Click on a result to open the “Video Details” panel on the right side, displaying:
- A video player at the detected timestamp
- A list of AI-generated descriptions for each segment with timestamps, for example:
- “Two people are seated at outdoor café tables with drinks and a phone; a brown and white dog sits on the pavement nearby.”
- “A person jogs past on the street; dog and café patrons remain in place.”
4. Analyze (Video Analysis)
Purpose
The Analyze feature allows you to perform detailed AI analysis on a specific video clip. You can ask any question about the video content — from summarizing events, detecting anomalies, identifying objects, to analyzing security behaviors. The system responds with a detailed report including timelines, event descriptions, and analytical insights.
How to Use
Step 1 – Open Analyze: From the index detail page, switch to the “Analyze” tab.
Step 2 – Select a Video Source: Click on the video area (showing “No video selected”).
- A “Select a source” dialog will open, displaying all videos from the current index as a thumbnail grid
- Click the video you want to analyze
Step 3 – Enter an Analysis Prompt: After selecting a video, you can either:
- Choose a pre-built suggestion from the right panel:
- Summarize this video
- Generate a timeline of events with timestamps
- Detect any anomalies or unusual activity
- Identify people and objects present
- What are the key security-relevant moments?
- Describe the activity level and patterns
- Or type your own question in the “Type a prompt or select a suggestion…” input box
Step 4 – Run Analysis: Click the “Run” button to submit your request.
- The system displays the estimated token count (e.g., 12 / 2000 tokens estimated) and begins processing
Step 5 – View Analysis Results: Results appear in the right panel with detailed content, including:
- Information header — Date, time, camera, location
- Event Timeline — A chronological timeline of events with specific time ranges
- Activity details — Descriptions of detected activities (objects, behaviors, interactions)
- Summary — An overall summary
5. Research (Multi-Video Research)
Purpose
The Research feature is an advanced analysis tool that allows the AI to automatically research across all video data within an index. Unlike Analyze (which works on a single video), Research uses an AI agent to automatically search, analyze, and synthesize information from multiple videos, then generate structured in-depth reports — including tables, visual evidence, and severity assessments.
How to Use
Step 1 – Open Research: There are two ways to access Research:
- From the left navigation bar, click “Research”
- Or from the index detail page, switch to the “Research” tab
Step 2 – Research Interface: The screen is divided into 3 panels:
| Panel | Description |
|---|---|
| Left Panel | Filter — List of source videos with time range filters: All, 24h, 7d, 30d, or Custom |
| Center Panel | Chat — Conversation area with the AI, ”+ New chat” button to start a new conversation |
| Right Panel | Report Templates & History — Pre-built report templates and research history |
Step 3 – Select a Report Type: In the right panel, choose one of the available research templates:
| Report Template | Description |
|---|---|
| Incident Report | Security incident reports with visual evidence and timestamps |
| Daily Summary | Activity overview across all cameras for the day |
| Anomaly Detection | Find unusual or unexpected events in video footage |
| Custom Research | Free-form analysis with your own instructions |
- Each template has a “Run” button to execute and a settings button to customize
- You can also add “Additional instructions” (e.g., “Focus on parking area incidents” or “Only report critical and high severity”)
Step 4 – Watch the Research Process: After running, the AI agent will automatically perform multiple steps:
- Search through video footage
- Capture visual evidence
- Analyze events and incidents
- Synthesize findings into a report
- The AI’s reasoning process is shown as expandable “Thought process” entries
Step 5 – View the Report: The result is a fully structured report, including:
- Executive Summary — High-level findings overview
- Incident Timeline — A detailed table of incidents with columns: #, Time (UTC), Camera, Severity (Critical / High / Medium), Description
- Incident Details — In-depth description of each incident
- Visual Evidence — Screenshots extracted from video with timestamps and descriptions
Step 6 – Ask Follow-up Questions: Use the chat input “What would you like to know?” to:
- Ask additional questions about the results
- Request deeper analysis
- Search for supplementary information
Step 7 – View History: The “History” tab (or the main Research page) displays all previous research runs with:
- Status (running / completed)
- Execution time and duration
- Click on any entry to review its results
6. Create Index & Index Configs
This feature is currently under development. We will update it soon.
Powered by PixelML